One of my biggest bug-bears is sharing logins where it isn’t necessary. Why would you want to add a user to your Google Analytics, when you could simply give them your login? Sharing passwords for account is always risky, and no matter how trustworthy an individual person is, when your passwords get shared far and wide, you only increase the opportunity for untoward or reckless behaviour. You also increase risk to your bottom line. As the business owner, leader or manager of your team, it’s up to you to model the responsible behaviour you expect in others. In that spirit – here’s a quick HOW TO so you can grant access to your outsourced Web Developer, or Marketing Agency.
Why would you add them as users and not simply just share your login ?
There are 2 reasons
- Google allows you to add users , and grant them varying degrees of access (security management) – at no cost.
- It’s a security risk every time you share passwords with anyone – so whenever possible, you should use the option to add a user when it is available.
Adding a user places the control back in your hands. As the account owner, you can revoke, or adjust the login settings and permissions of that user at any time. You also don’t have to reset passwords whenever a staff member leaves.
If you’ve shared the main account login however, the other person has the ability to “go rogue” , which happens less often than we think, but often enough that most people have a war story or two.
What is required ?
A Google Account is required. Note , you can have a google account that is not a gmail account, and you can use your own email,. Note this is NOT a GMAIL specifically , as any email address that is associated with a google account will work, including Google Workspace or even a Youtube login. If the person does nto have a google account, you can direct them to this link to sign up for an account https://support.google.com/accounts/answer/27441?hl=en#existingemail
When you have their google account details, here’s how to proceed:

Login to your account, find the “View” or “website” that you are tracking , and then click on the Cog titled “Admin” on the bottom left of the screen to enter the Admin Settings. On some devices it may say “settings”
Then select Account Access Management from the first column of options displayed on the screen under the Account heading (and beneath the big blue +Create Account button). Note if you had multiple properties ( ie multiple website domains for your brand) connected to the account, you can select Property Access Management from the second column of options for the specific property; to assign rights to only one property.

Click on the Big Blue plus button on the right of the next screen, and then select Add Users.

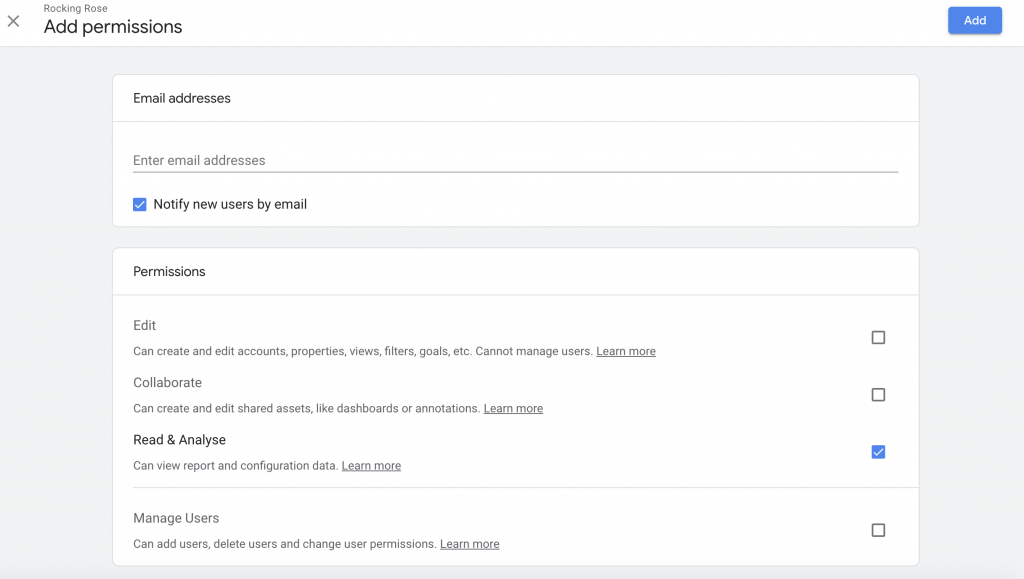
Enter the email address (associated with a Google Account) for the user, and tick the boxes to apply the permissions you want to give them. And finally click on the blue ADD button to save and add them. Ensure you have ticked the NOTIFY option so that they get an email informing them of their access and details of their permissions.

If there are any errors, you will see a message confirming what to fix or change, otherwise the update will be saved and you will see the new user in the list of users once the screen closes.
Happy updating!
If you need assistance with any Google Account products for your business, staff or managing outside vendors and service providers – you know where to find us! Reach out and let’s have a quick confidential discussion.


